The Basic Principles Of "How to Properly Use a Biscuit Joiner in Your DIY Projects"


A cookie joint is a woodworking strategy that includes utilizing a joiner to reduced suit slots in two items of lumber, and after that gluing them together with a thin, oval-shaped piece of wood phoned a cookie. This method is typically made use of in home furniture making, kitchen cabinetry, and various other woodworking jobs where tough, unnoticeable joints are needed.
If you're new to this procedure or you're appearing for techniques to boost your biscuit junctions, this step-by-step guide are going to help you create ideal biscuit junctions every time.
Action 1: Decide on the Right Size Cookies
Before you begin reducing ports along with your joiner, it's necessary to decide on the right measurements cookies. Cookies come in different sizes ranging from #0 to #20. The size of the cookies you pick are going to depend on the density of your panels and the size of your ports.
As a basic policy, #0 biscuits are best suited for thinner boards while much larger biscuits like #10 or #20 are far better for more thick panels. It's likewise necessary to select biscuits that suit snugly in the slots. If they're also loosened or also tight, they will definitelyn't create a sturdy junction.
Measure 2: Established Up Your Joiner
Once you've chosen the appropriate size cookies for your task, it's time to specified up your joiner. Start through changing the fencing so that it's parallel to the cutters. This will make sure that each ports are cut at the very same perspective and depth.
Next off, change the height of the cutters so that they're flush with the top of your panel. You don't yearn for them cutting as well deep right into your panel or not deep-seated good enough.
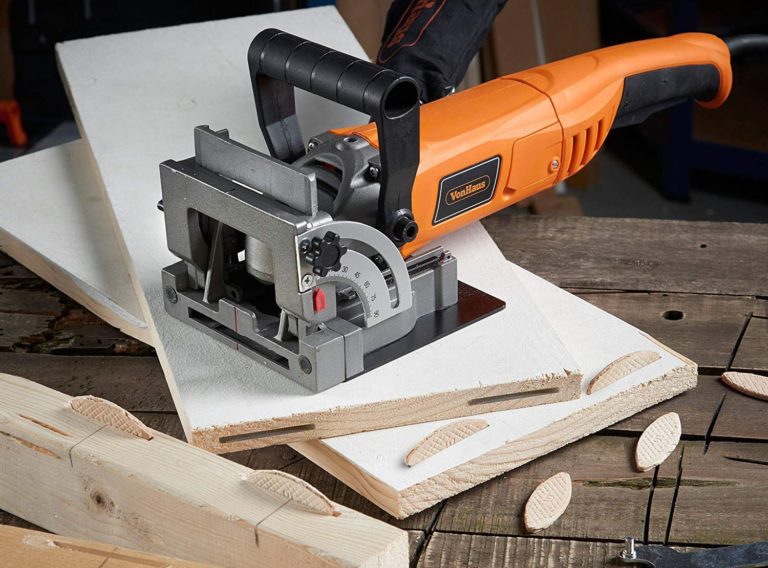
Measure 3: Reduced Your Slots
With your joiner set up appropriately, it's opportunity to start cutting your slots. Start through noting where The Latest Info Found Here yearn for each port to be on each boards making use of a pencil or noting knife.
At that point position one panel standard on your work surface and use the joiner to cut a slot on one end of the board. Duplicate this procedure on the various other panel.
It's vital to produce sure that both ports are cut at the very same intensity and perspective. You can perform this by using a depth gauge or by helping make test cuts on fragment timber until you obtain the appropriate depth.
Action 4: Place Your Cookies
Once your slots are cut, it's time to place your cookies. Apply a thin level of adhesive to the inside of each port, at that point place your biscuit right into one of the ports.
Make sure that it's placed all the method and that it fits well. Duplicate this process along with the other cookie and port.
Measure 5: Brace Your Panels All together
With both cookies put, it's time to secure your boards with each other. Administer a small quantity of adhesive along each side of one board, after that place the other board on best.
Create sure that they're edged up properly and make use of clamps to hold them in area while the glue dries. Clean away any type of excess adhesive with a moist towel before it dries out.
Action 6: Sand and Finish Your Joint
Once your junction is dry out, remove the clamps and sand away any excess adhesive or harsh areas on your joint. You can easily additionally finish your joint along with discoloration or paint if intended.
Congratulations! You've properly produced a sturdy, unseen junction utilizing biscuit joinery. Along with method, you'll be able to make excellent cookie joints every opportunity for all of your woodworking projects.